
Create Your First App Using Sketchware
In today’s digital age, the demand for mobile applications is continuously increasing. People rely on apps for various purposes, be it for entertainment, productivity, education, or staying connected with others. The idea of developing your own app can be enticing, but the perceived complexity of programming might deter many from taking the leap. However, there is good news! Thanks to innovative app development platforms like Sketchware, creating your very own Android app has become accessible to almost anyone, regardless of coding experience. In this blog, we will introduce you to Sketchware, a revolutionary app that allows you to develop Android applications using a block programming approach, making app development a breeze for beginners. Let’s dive in and explore the basics of Sketchware, step-by-step.
Step 1: Getting Started
To begin your app development journey with Sketchware, you’ll need to download and install the app. While Sketchware might not be available on the Play Store, you can easily find it on GitHub, a popular platform for hosting and sharing code repositories. To get started, visit the provided link, download the app, and follow the installation instructions. Once Sketchware is up and running on your Android device, you’re all set to embark on a creative journey of app building. Click here to download.
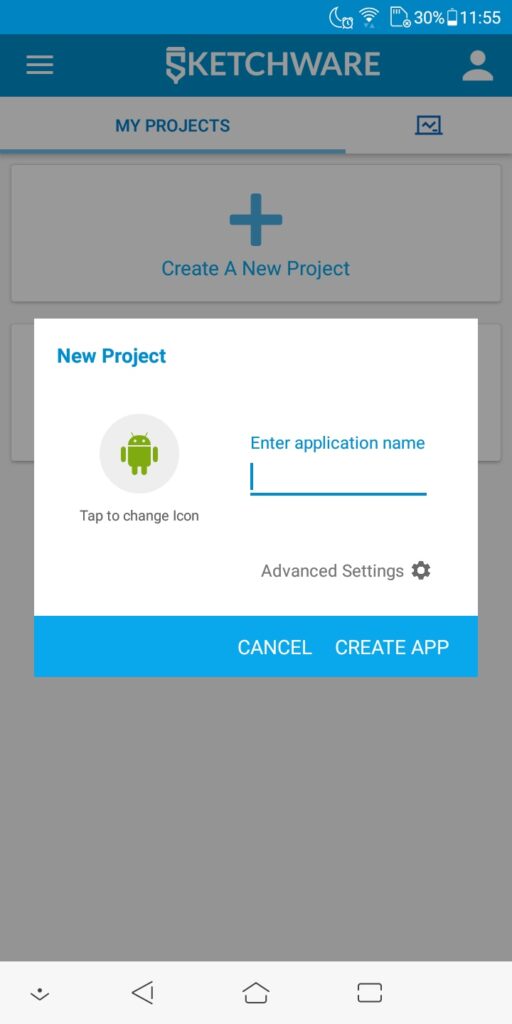
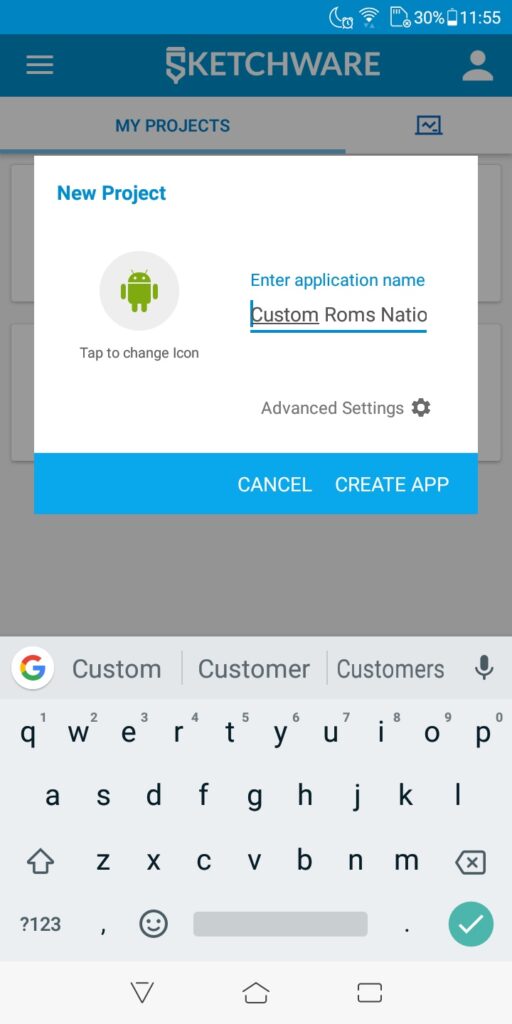
Upon launching Sketchware, you’ll be greeted with a welcoming interface. Click on the “+” icon to create a new application. Give your app a name that reflects its purpose, and then click on “CREATE APP.” You will now be taken to the View section, where you can design the visual layout of your app using various elements available on the left side of the screen.
Step 2: Designing Your App’s Layout
In the View section, you’ll see a variety of elements that you can use to build your app’s user interface. These elements serve as the building blocks for your app’s layout and functionality. For instance, you can use the “Linear(H)” element, which allows you to place other objects horizontally. Similarly, “Linear(V)” lets you arrange elements vertically. This level of flexibility allows you to create visually appealing and interactive app interfaces with ease.
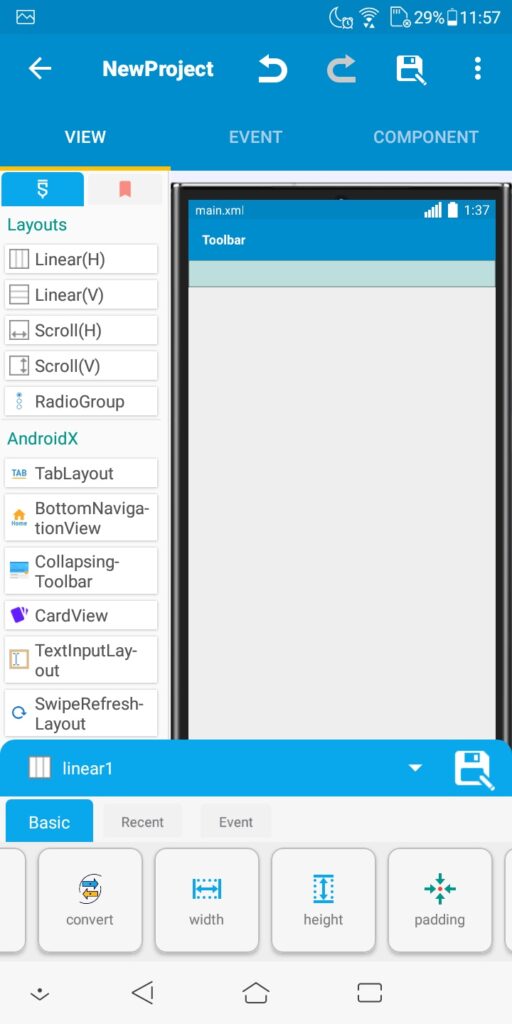
By selecting an element and changing its properties, you can customize its appearance as per your preferences. For example, you can adjust the height of an element by selecting “match_parent” to make it fill the entire screen. Moreover, you can explore various properties like width, background color, text size, and many more to fine-tune the visual aspects of your app.
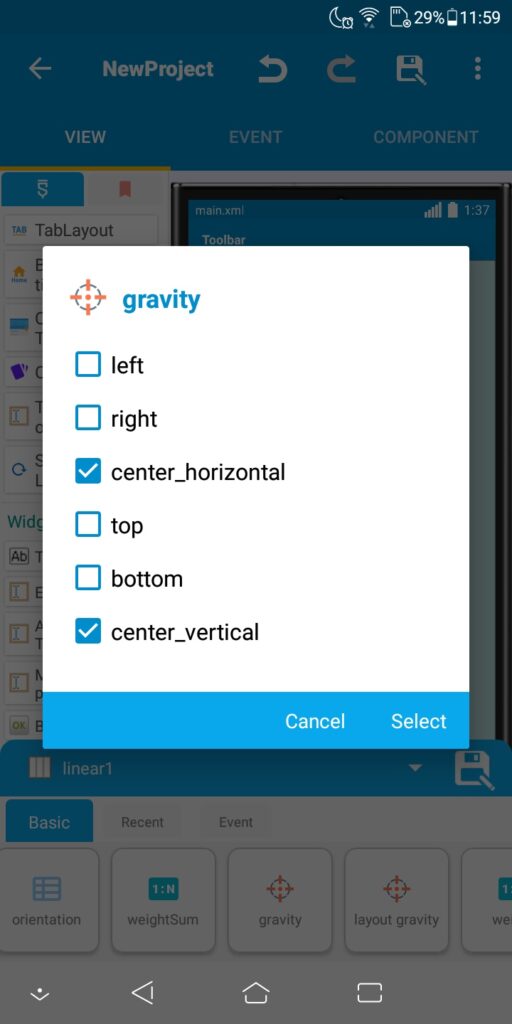
To demonstrate, let’s create a simple layout for our app. Drag and drop the “Linear(H)” element onto the screen. As you do this, a bottom sheet will appear, displaying the properties of the dropped element. Modify the height to “match_parent,” and you’ll notice the element expands to cover the entire screen. Additionally, explore the “Gravity” property and mark the center horizontal and center vertical checkboxes to align the element in the middle of the screen.
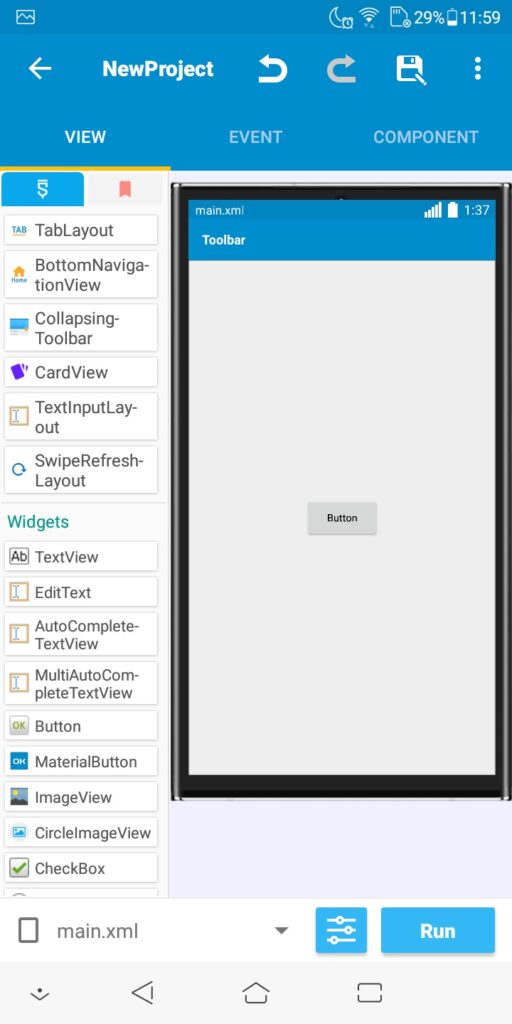
Step 3: Adding a Button
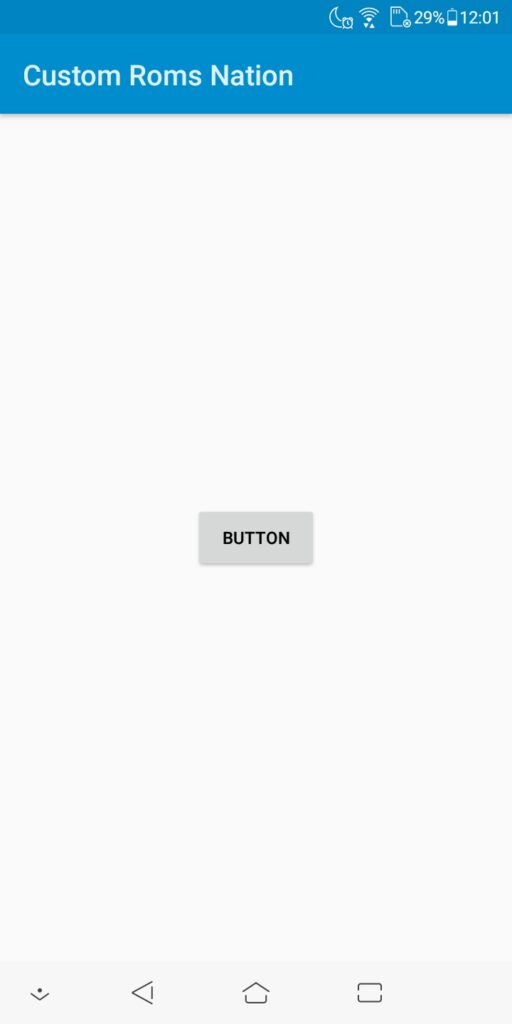
Let’s take it a step further and add a button to the app. In the View section, you’ll find a wide range of elements, and one of them is the “Button” element, which is commonly used to initiate actions when clicked by the user. To add a button, simply drag and drop the “Button” element onto the screen. Thanks to the “Gravity” property set in the previous step, the button will be centered on the screen, creating a visually pleasing layout.
Step 4: Creating Logic for the Button
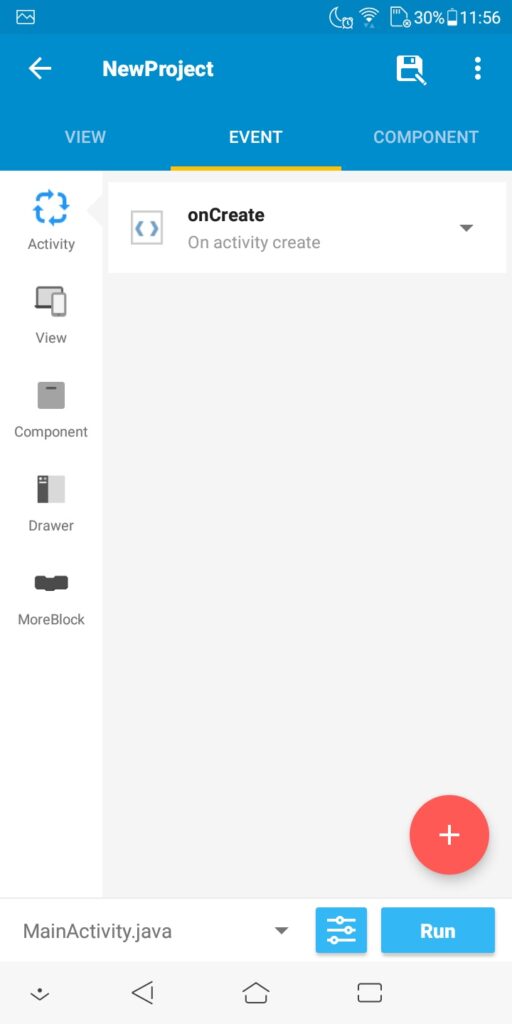
The visual layout is just one part of building an app. To make the app truly functional, you need to add logic to the elements. This is where the Event section comes into play. In Sketchware, events are actions that trigger specific responses from the app. For example, when a user clicks a button, an event is triggered, and you can define what action the app should take in response.
To add logic to the button we just added, head to the Event section and select the “View” option. Here, you’ll find the “button1” listed, representing the button we added. Click on it, and then click on the icon at the bottom right corner to navigate back to the View section.
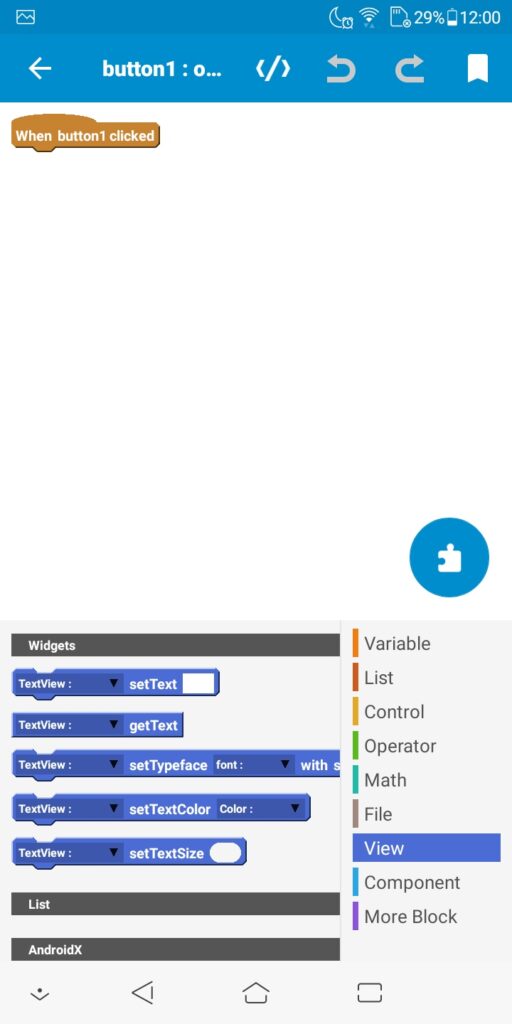
Next, scroll down through the view blocks until you find the “TextView setText” block. This block allows you to change the text displayed on a TextView element dynamically. Drag this block to the top, and you’ll notice that it contains slots where you can input values.
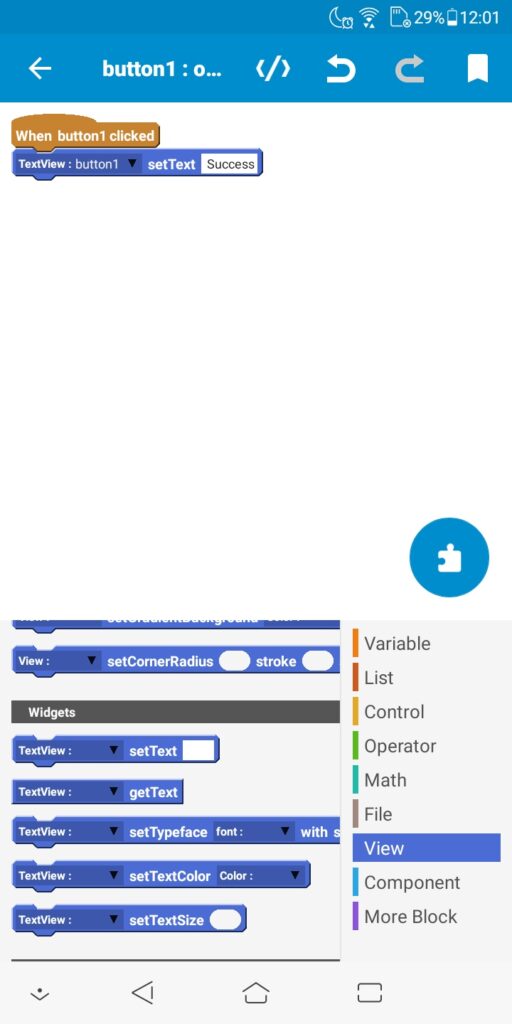
Click on the TextView element you wish to modify (in this case, the button itself), and then select “Button1” from the list. Now, in the available free space on the block, give the new text value that you want the button to display. For instance, you can set it to “Click Me!” or any other text you desire.
Step 5: Testing Your App
With the logic in place, it’s time to test your app! Go back to the View screen and click on “Run” to see your app in action. Sketchware will compile the code and generate an APK file, which you can then install on your device.
Once the app is installed, click on the button you added, and voilà! You’ve just created your first app that changes the text on the button when clicked. Congratulations on building your first functional app using Sketchware!

To talk more about Sketchware, It offers a user-friendly platform for individuals with little or no coding experience to develop their own Android applications. Through its block programming approach, Sketchware makes app development accessible and enjoyable for beginners and aspiring developers alike. The step-by-step process of designing the app’s layout, adding elements, and defining logic makes it easy to create functional and interactive apps without writing a single line of code.
This blog has provided you with a comprehensive overview of creating your first app using Sketchware, covering the initial setup, layout design, adding elements, and implementing logic. Now that you’ve experienced the power of Sketchware, you can further explore its features, experiment with more complex app ideas, and unleash your creativity to build even more impressive applications.
Remember, practice makes perfect, and the more you delve into app development with Sketchware, the more proficient you’ll become. So don’t hesitate to experiment, try out different elements, and discover the vast possibilities that Sketchware offers for transforming your app ideas into reality. Happy app building!